Anyway. I made it of some pastel coloured yarn that my Mum passed to me when she was having a clear out. She is very elderly now, and the last couple of years has found her not managing to keep track of knitting patterns. I feel a bit sad about this, after a lifetime of knitting socks and sweaters and so on, practically in her sleep, it seems a shame to lose the pleasure of it. But, she doesn't seem to mind much, and I realise that she is of a generation that often knitted for genuine practicality or economics, and not necessarily for pleasure. But, as I grow older I feel more and more that a) I want to preserve and value the skills she passed down to me, and b) that the practise of 'make do and mend' and 'waste not want not' are properly relevant again today in our recession dominated times......anyway, back to the recipe.
Here is Ava, doing a fine job of modelling the scarf.
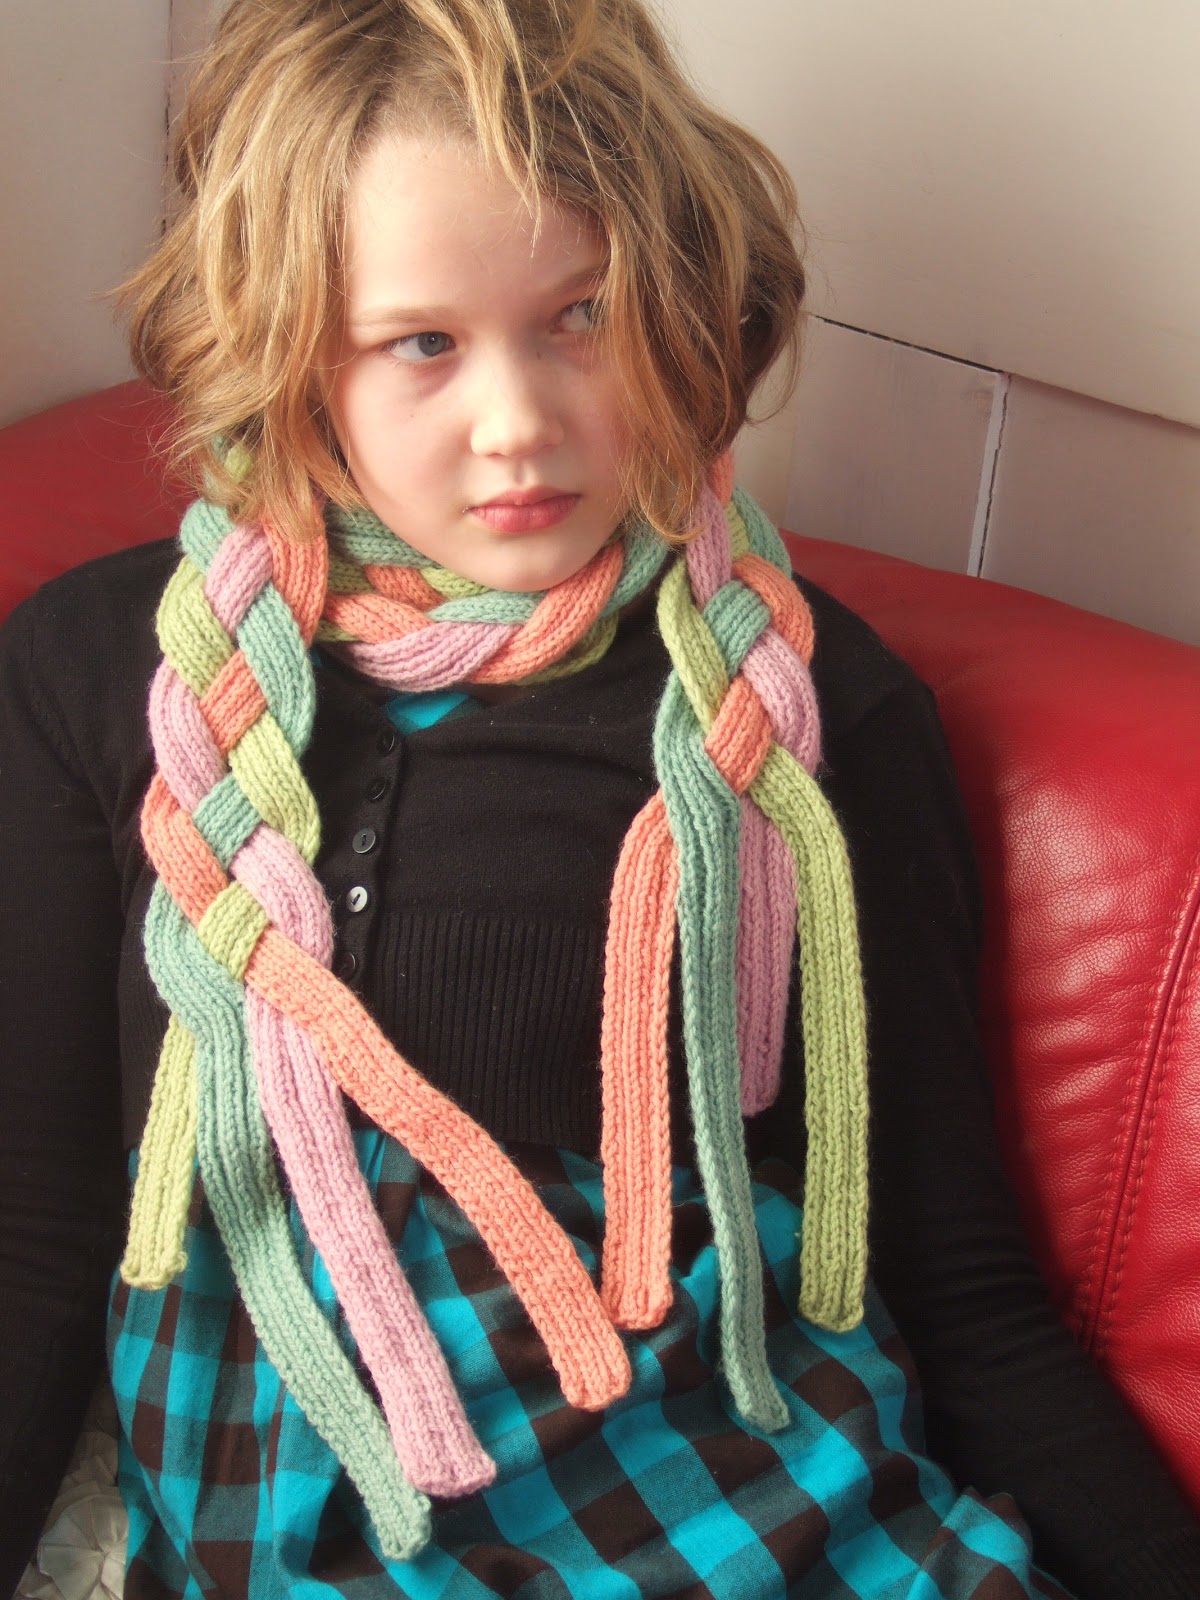
The sugary colours reminded me of those fat marshmallow twists called Flumps, so I designed the scarf with those in mind, but you could use any yarn you fancy. I'd go for something really cushy and bouncy and soft if I were you. You don't have to have contrasting or complementary colours, but my advice is that as it is a pretty repetitive knit, then really nice yarn and yummy colours that make you go gooey and that you love feeling in your hands are going to be key motivators
So. In your chosen yarn, using needle size to suit, CO (cable method) 8 st.
1: Slp 1, K2, P2, K3
2: Slp 1, P2, K2, P3
I made my strips about 190 cm/112 inches long. It looks like too much, but you need to allow for a bit of take up from the plaiting. The finished piece shown here is 170 cm/104 inches. So, the basic rule is to repeat these two rows until you never want to knit again, and then knit some more, at least half as much again. You mustn't cheat on this bit. If you make the strips too short, when you come to plait it up you won't have a scarf. I don't know what you would call it but it won't be a scarf....(Now here's a thought, if you used a provisional CO, and cheat on the length bit, you could probably plait it all up then graft the ends and have a groovy cowl, and it wouldn't make you want to never knit anything ever again....)
Then do it again in a different colour. And again. One more time. You can do five colours, six, as many as you want.
So, once you've got three or more strips knitted, you can start plaiting. I did it by laying them out flat and deciding roughly about the most attractive arrangement of colours and differing length of the loose tails. Remember, I was using up pre-loved partially used balls of yarn, so I had to work with the limitations available to me. You could make it all neat and tidy if you wanted, but then you might as well just make a nice cabled scarf and be done with it. I stitched the ends together for a few rows, and then plaited loosely, then stitched again at the other end to fix them. It's surprisingly stable considering the strips are just plaited and only fixed at the ends.
I feel I should apologise at this point, for making this a ridiculously long piece of text in order to explain how to make a scarf that actually needs almost no instructions.....Have fun!

No comments:
Post a Comment